![]() ServiceNow is a great cloud service. Although it offers some reporting capabilities, many ServiceNow customers have complicated requirements for reporting or business analytics. Either ServiceNow’s reporting is not sufficient for them, or their corporate standard is a different BI or reporting solution.
ServiceNow is a great cloud service. Although it offers some reporting capabilities, many ServiceNow customers have complicated requirements for reporting or business analytics. Either ServiceNow’s reporting is not sufficient for them, or their corporate standard is a different BI or reporting solution.
Many of our customers use Tableau. It is a leading BI tool, powerful and easy to use. Let’s have a look at how to configure Tableau to use ServiceNow data and to perform some analysis. The same approach would apply to QlikView, SAS Advanced Analytics or SAP Business Objects.
It is generally not a good idea to connect Tableau to a ServiceNow instance directly (i.e. live) for several reasons:
- ServiceNow is a cloud solution so every single data request goes over the Internet and back.
- Performing complex queries, reports and analysis on a production instance is like playing with fire. Sooner or later such a query kills the whole instance and ServiceNow will become unavailable. Never ever let reporting users access a live environment.
- The original ServiceNow ODBC driver is very limited. It looks like a real ODBC driver but it is not! It is just a lite wrapper around ServiceNow web services. So no real database access, just web service calls. And web services themselves are very limited. It is not possible to perform complex queries, joins, and aggregations. The limitations are so huge everyone will discover them very soon.
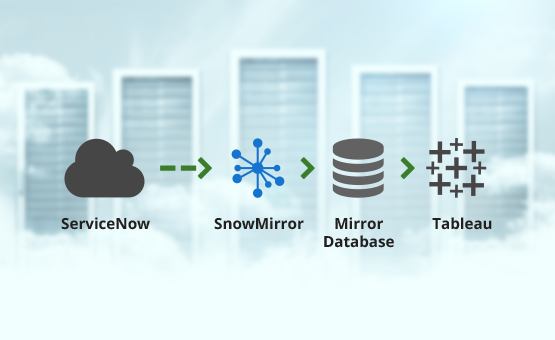
The solution is rather simple. Replicate the ServiceNow data into a traditional database and connect Tableau to that dedicated reporting database (e.g. Oracle, SQL Server, etc.). This guide will show you how to configure SnowMirror with a MySQL database and how to create a simple incident report using Tableau and the downloaded data.
1. Create a Database
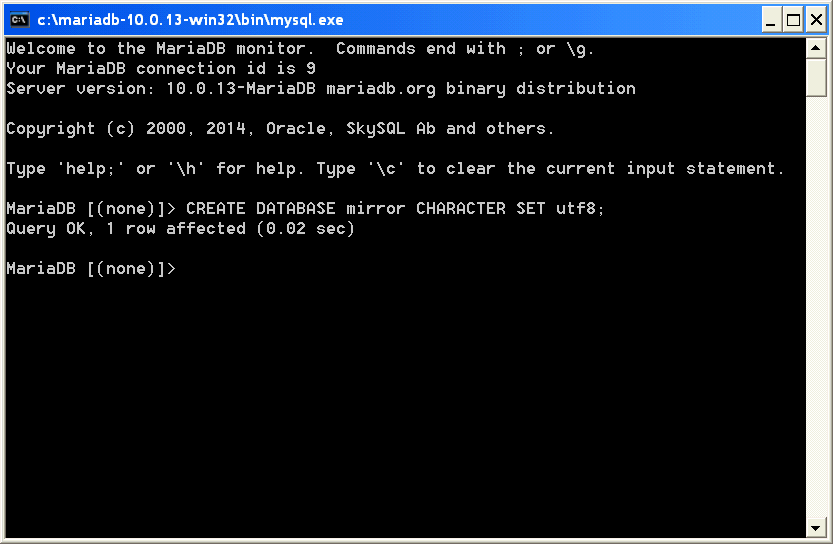
You need a database where the replicated data will be stored. Use a database you like or which one is your corporate standard. SnowMirror supports all widely known DB vendors. In this guide, I will use MySQL (in fact MariaDB). It is easy to create a database instance, just do not forget to configure UTF-8 encoding because all ServiceNow strings use UTF-8. You can create a DB user for the database too.
2. Install SnowMirror
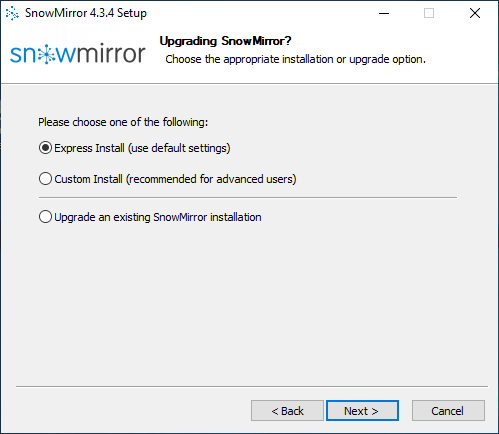
Download and install the SnowMirror tool. You can use a trial license provided by our website. Follow our Installation Guide or these simple steps for Windows machines:
- Download the SnowMirror installer
- Run the installer and choose Express Install
- After the SnowMirror service starts up, a config wizard appears in a browser
- Enter your trial license
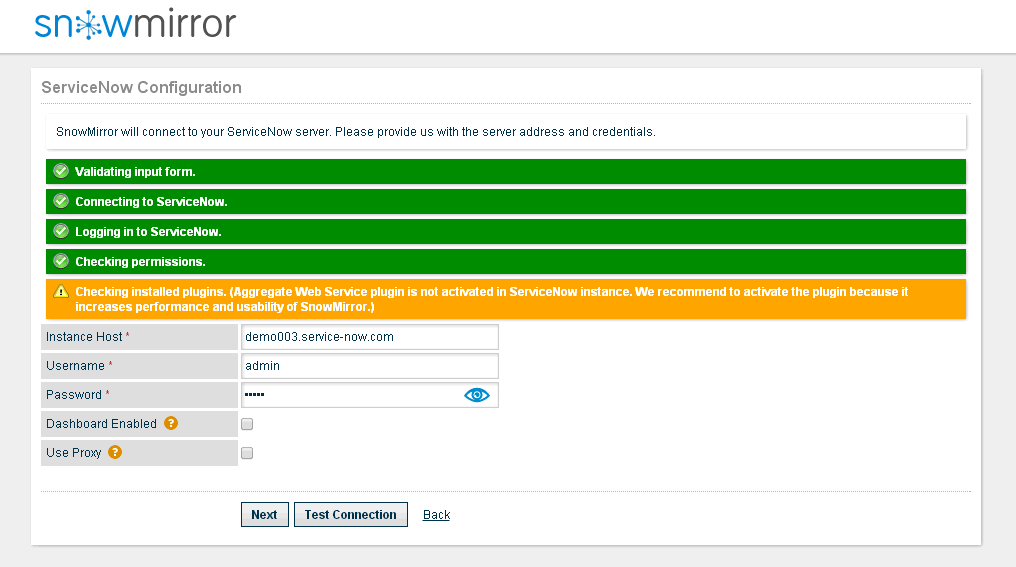
- Configure your ServiceNow instance and credentials of a user with admin rights
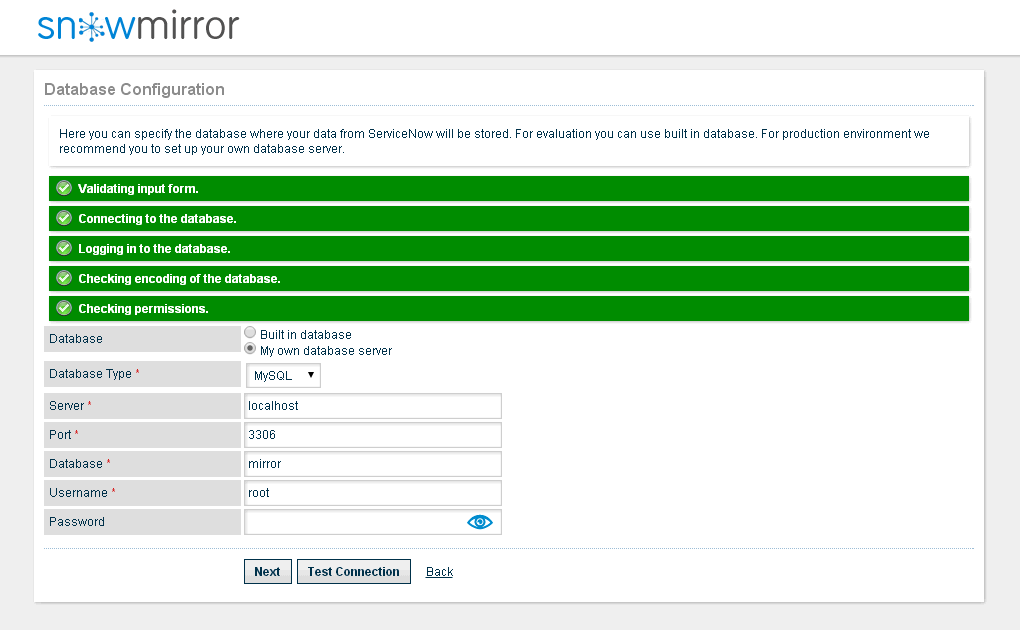
- Configure the database you prepared in step 1
- Finish the config wizard
3. Select Tables To Synchronize
Let’s say your goal is to create several reports in Tableau on the Incident Management process. Imagine some crosstabs on incidents by assignment groups, trends of critical incidents or even a map with incident locations. That would require you to have data from the following tables:
- incident
- sys_user
- sys_user_group
- cmdb_ci
- cmn_location
Data synchronization from ServiceNow into MySQL using SnowMirror is really simple:
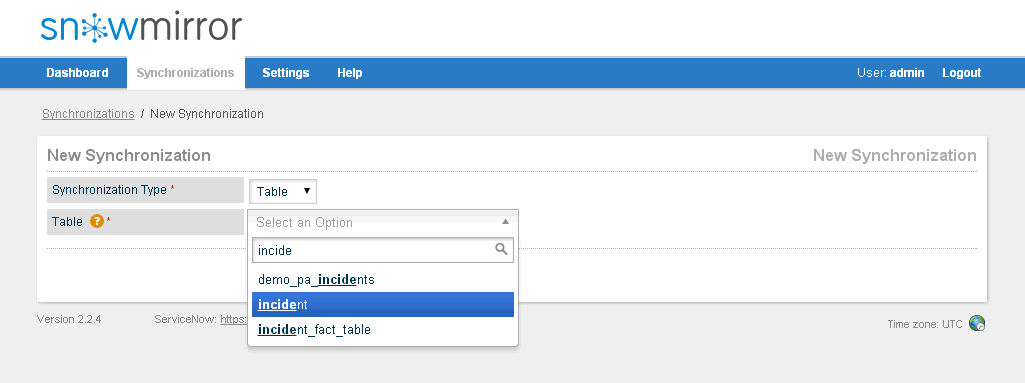
- Choose New Synchronization on the Synchronizations screen
- Select a table to synchronize (e.g. incident)
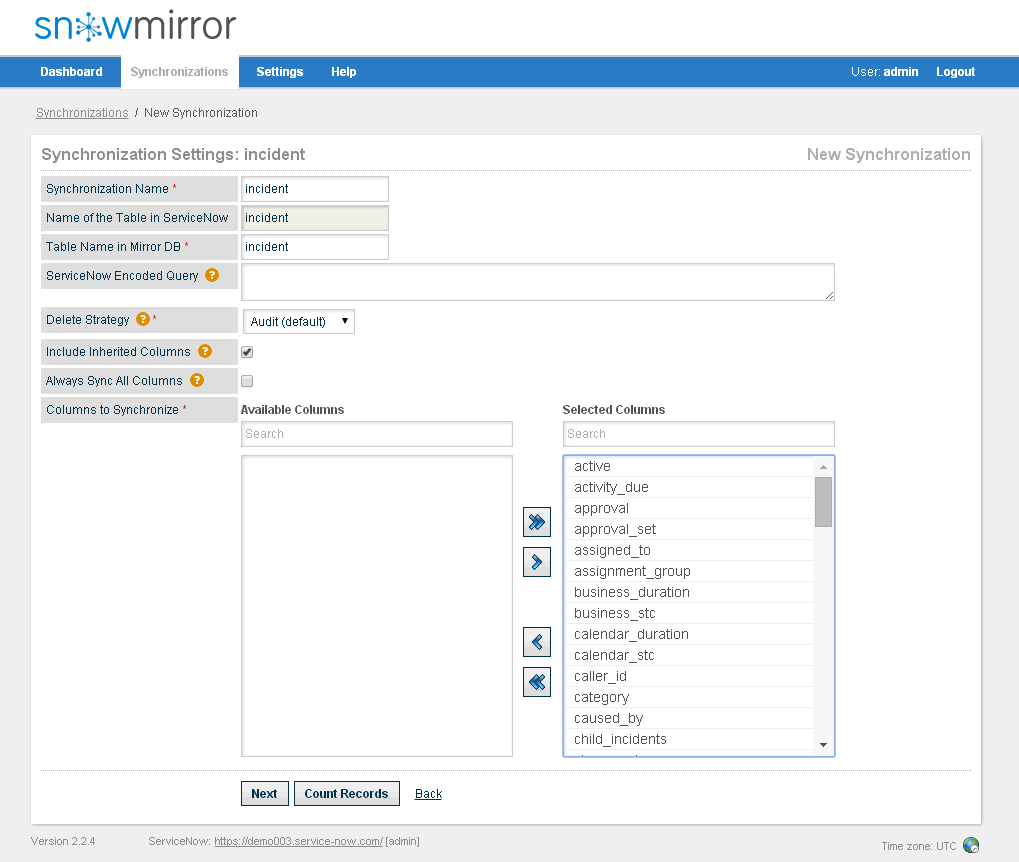
- Select columns you need, including those from the task table
- Configure scheduler if you need to download changes regularly (e.g. once a day)
- For the first time, you can trigger a manual download
- Configure the rest of the tables using steps 1-5 or a feature called Bulk Create
You can read more about many SnowMirror features in the User Guide. 
4. Create Tableau Data Source
So now the data is in your MySQL (or any other) database. It is very straightforward to create a Tableau data source. This is not specific to either ServiceNow or SnowMirror. It’s just a standard Tableau way of connecting to a relational database.
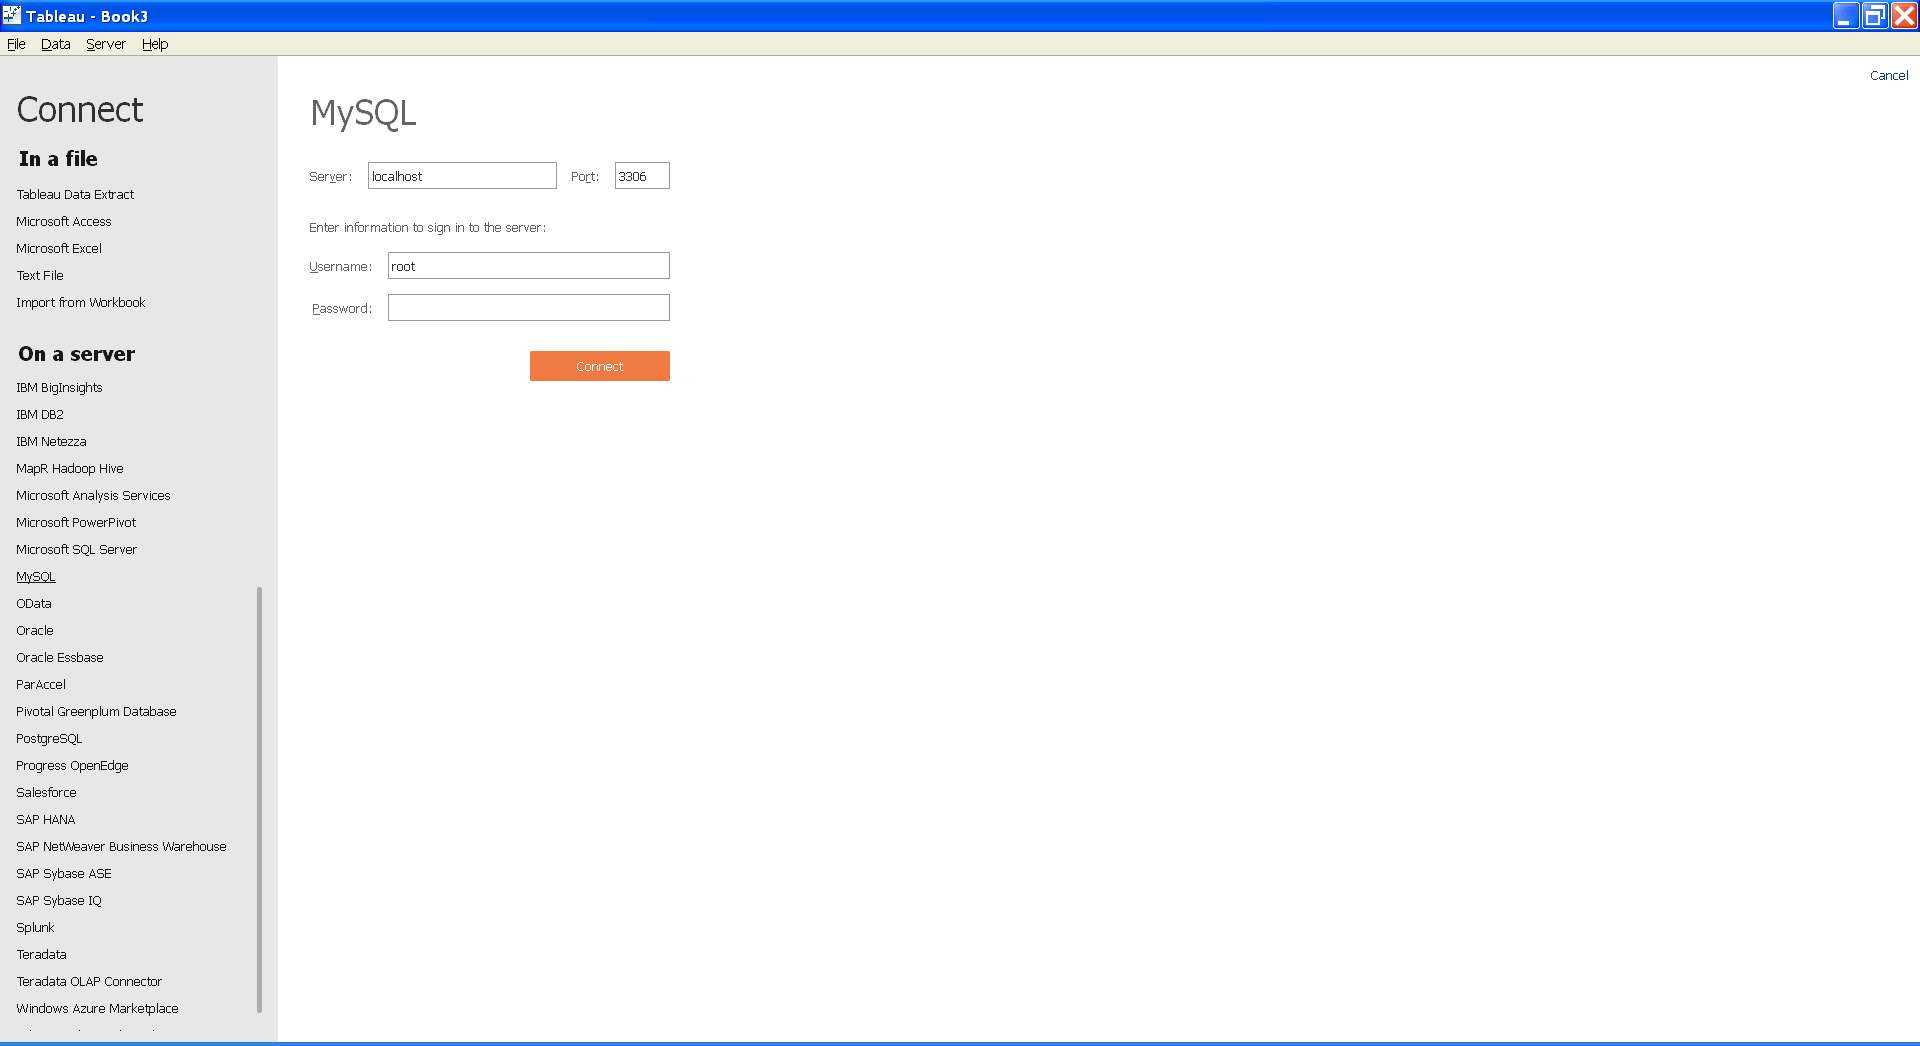
- Select Data –> Connect to Data…
- Choose your DB type (e.g. MySQL)
- Fill your DB host and credentials
- Hit Connect
On the next screen, your goal is to build a data source. Again a standard Tableau way of connecting tables. It only requires you to understand the ServiceNow data model.
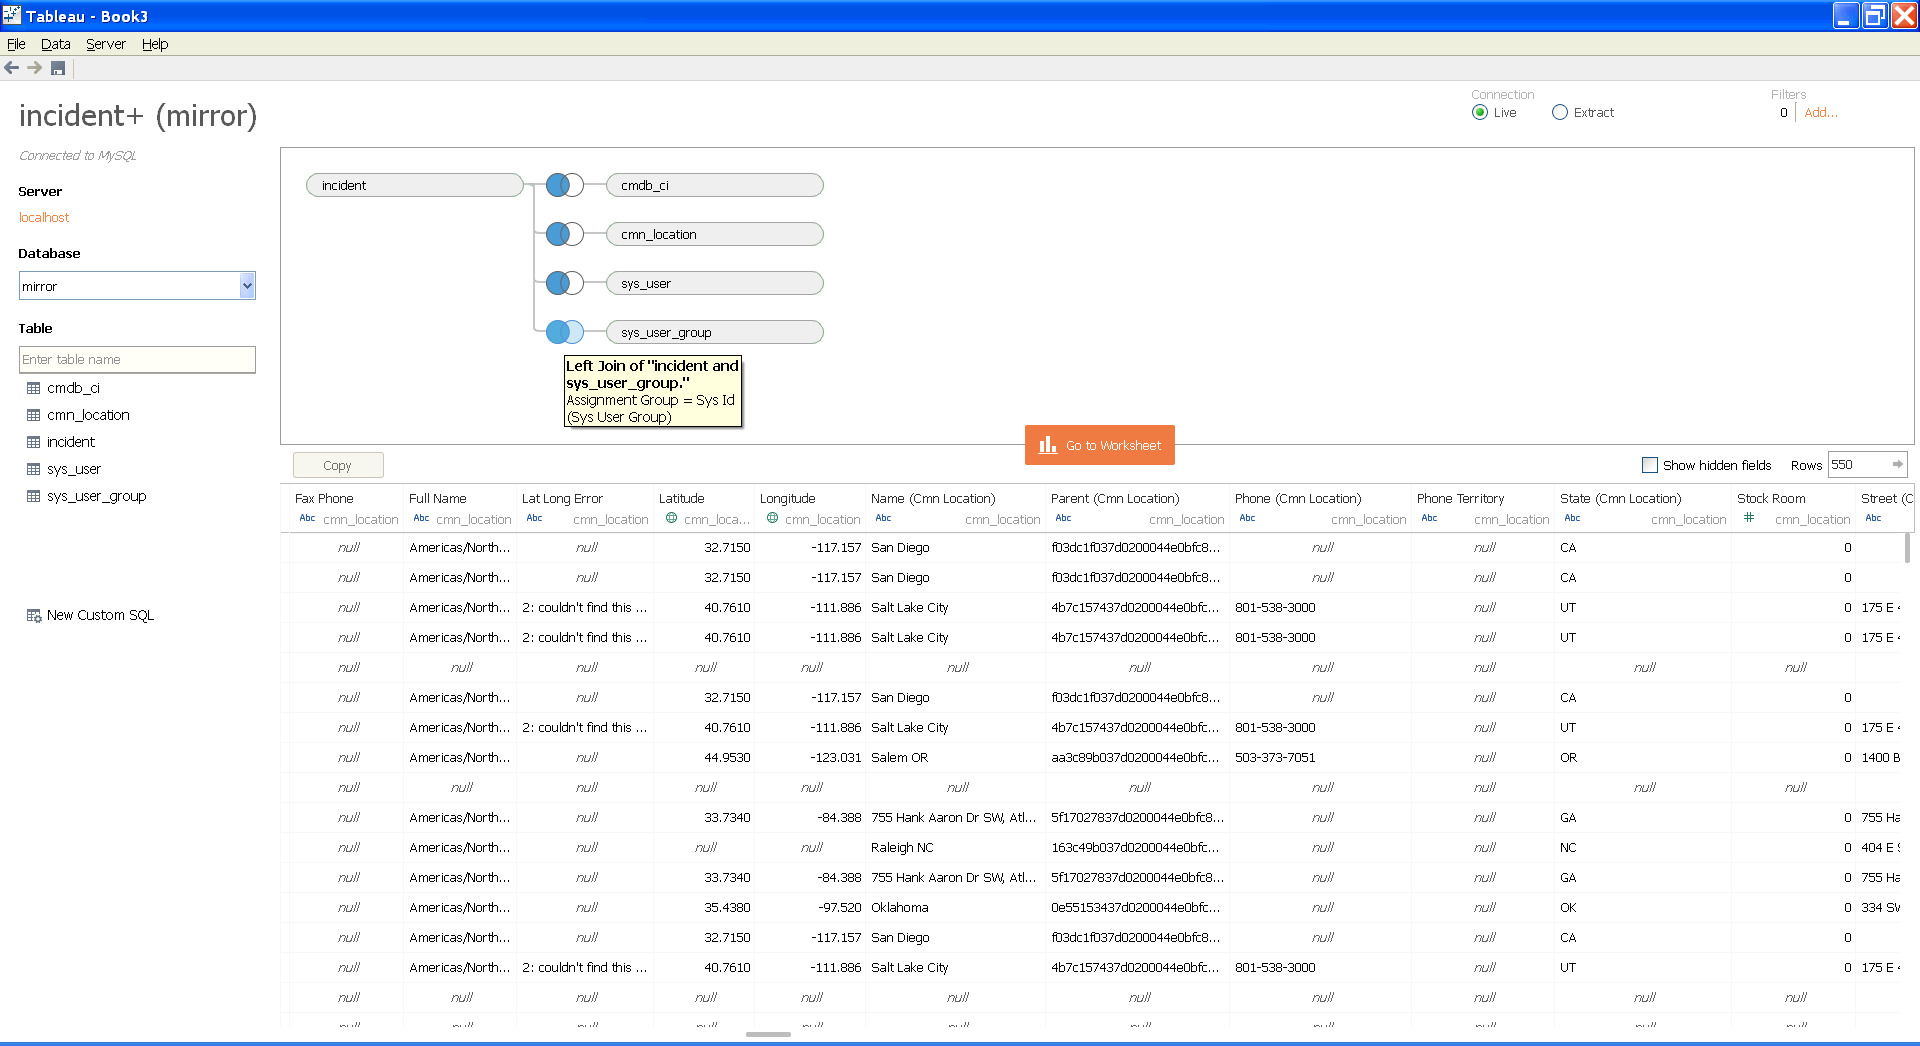
- Select a database in which you have the mirrored data (e.g. mirror)
- Drag & drop the tables you need onto the main panel
- Adjust the join conditions. For example, I made a left join on incidents with users using Caller ID = sys_id (in sys_user table), and three more tables this way.
- Verify your data source in the table below
5. Happy Analyzing

Voila! Now you have all the data you need in your local (or corporate) database, the data is being regularly updated, so you can create reports on live data (not only extracts). I have prepared a simple map showing incidents in the U.S. cities. The size of each city is a number of incidents and the colors in the pie chart show priority distribution.
Please do not hesitate to contact us at info@snow-mirror.com. We’re ready to help you with any questions you might have related to SnowMirror and Tableau.